
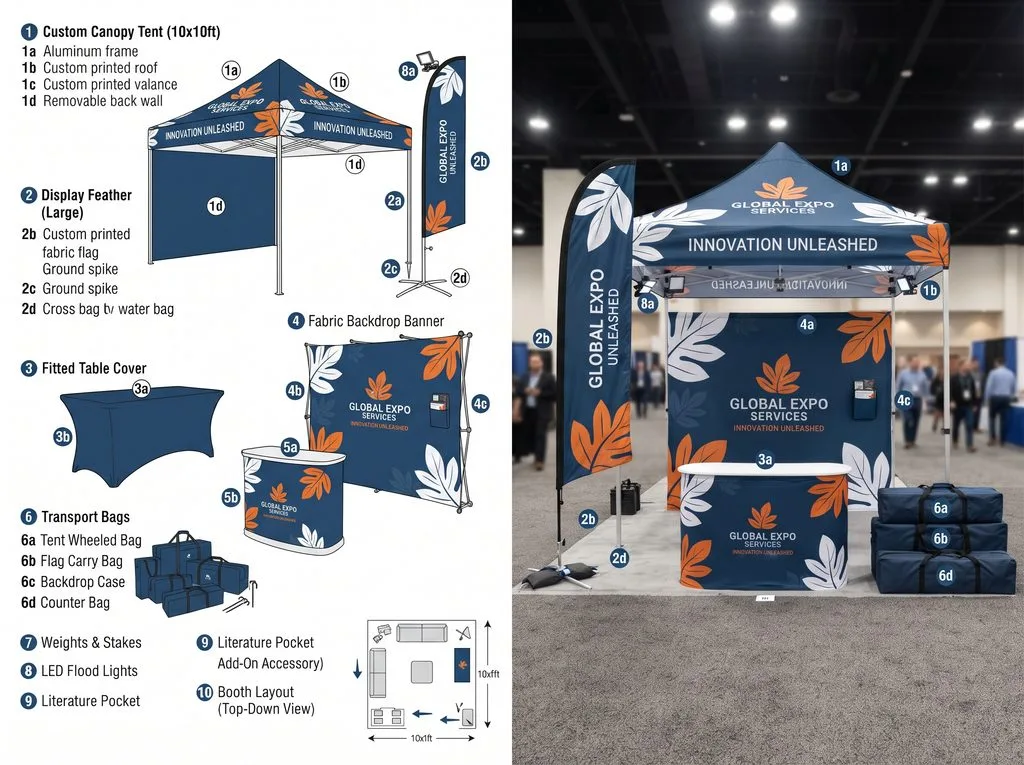
A complete trade show display kit combines one main structure, supporting graphics, an interaction area, wayfinding, operating supplies, and transport protection. Every item should follow the same logo rules, color references, message hierarchy, and labeling system.
First, define the visitor journey rather than starting with a product list. Decide what people should notice, where they should stop, and what action they should take. Then assign one display component to each job.
Quick answer: A consistent kit usually includes a branded shelter or backdrop, table cover, flags or banners, product counter, printed panels, lighting, hardware, spare parts, bags, labels, and a setup guide.
What Belongs in a Complete Trade Show Display Kit?
Next, build the kit in layers. The main structure attracts visitors, secondary displays explain the offer, and the interaction area supports staff conversations.
| Kit layer | Typical components | Brand-control question |
|---|---|---|
| Main structure | Custom canopy tent, backdrop, inflatable shelter, or display wall | Does it carry the main brand mark at the correct viewing height? |
| Secondary graphics | Flags, pop-up banners, sidewalls, hanging signs, or header panels | Do these items repeat one message hierarchy instead of competing messages? |
| Interaction area | Printed table cover, counter, product stand, chairs, or demo surface | Can staff use the area without covering key graphics? |
| Visitor guidance | Entrance flag, directional sign, floor marker, or queue sign | Can visitors understand where to enter, wait, and ask questions? |
| Operations | Lights, approved power items, tools, cleaning supplies, and setup instructions | Can the team install and operate the booth without improvised equipment? |
| Transport and spares | Bags, cartons, labels, repair parts, and inventory sheet | Can the warehouse identify every kit and replace a missing part? |
The exact mix depends on the booth size, venue rules, visitor flow, and campaign goal. Therefore, use the table as a planning framework rather than a fixed package.
Step 1: Define the Visitor Journey
First, write the visitor journey before selecting hardware. A useful brief answers four questions:
- What should visitors notice from the aisle?
- Where should they enter or stop?
- What should staff demonstrate, explain, or collect?
- What action should visitors take next?
For example, a sampling booth may need an open front, two serving points, and visible storage. A product launch may need a hero backdrop, demo counter, and controlled queue.
As a result, this step prevents a common mistake: buying several attractive displays that do not work together at the venue.
Step 2: Choose One Visual Anchor
The visual anchor should carry the strongest brand signal. It may be a custom canopy tent, a printed backdrop, or another large-format structure.
For example, a canopy works well for outdoor activations, markets, registration points, and open-sided booths. A backdrop may suit indoor presentations, media areas, and photo zones. Larger experiential projects may combine both.
Therefore, keep the anchor message simple. Use the brand name, one campaign idea, and one visual cue. Detailed product information belongs on displays that visitors read from a shorter distance.
MorningTents presents steel and aluminum canopy frames, printed roofs, sidewalls, and package accessories on its product page. Buyers should confirm the selected frame, textile, dimensions, wall layout, anchors, and packing in the quotation.
Step 3: Create a Three-Level Message System
A consistent booth needs a clear message hierarchy. Organize content by viewing distance.
Distance message
Use the logo, brand color, or short campaign line on the tent, backdrop, or tall flag. Visitors should recognize the brand before they reach the booth.
Approach message
Place a product category, benefit, or event-specific offer on sidewalls and banners. Keep the copy short enough for someone walking past.
Conversation message
Use counters, table graphics, handouts, screens, or product cards for details. Staff can explain this content during the interaction.
This system gives every component a job. It also prevents six displays from repeating the same logo without helping the visitor.
Step 4: Lock Brand Colors and Artwork Rules
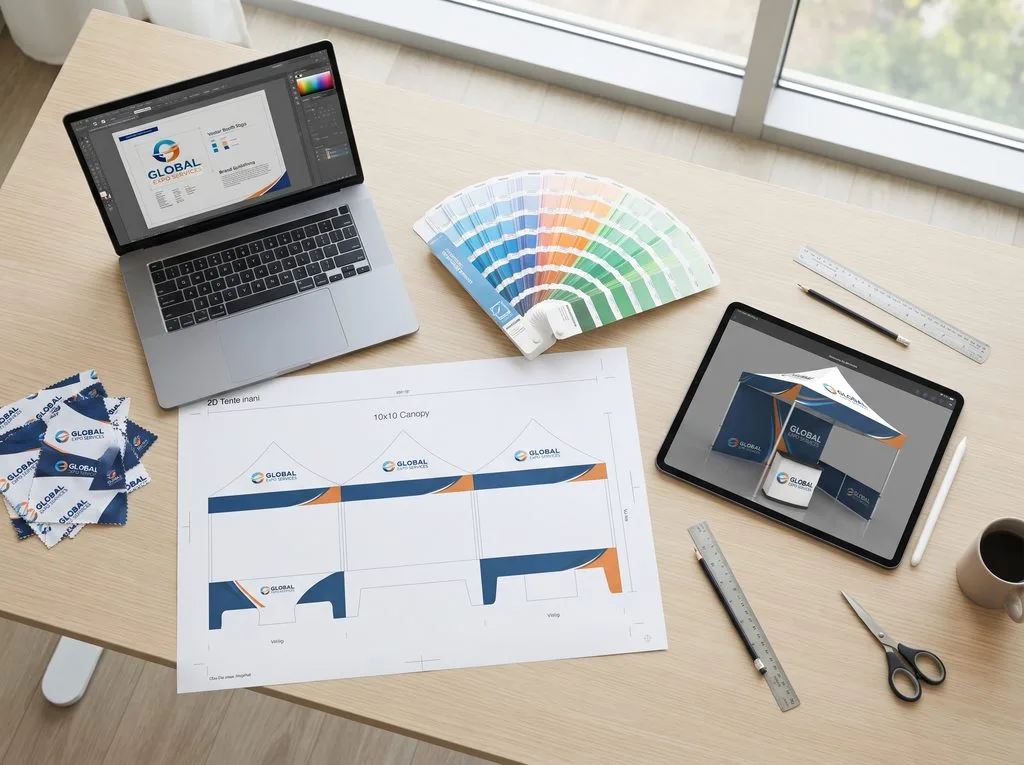
Also, use one artwork control sheet for the full trade show display kit. It should record logo versions, color references, fonts, minimum clear space, image style, and approved messages.
Digital files can display color differently across devices and print processes. The International Color Consortium profile guidance explains how ICC profiles support color communication between devices. However, an ICC workflow does not replace a physical color check for a critical brand shade.
Next, ask the supplier for:
- Artwork templates for every printed component
- Accepted file formats and image-resolution rules
- The required color mode and embedded profile
- A 2D proof for each panel
- A 3D view of the assembled kit
- A printed swatch or sample for critical colors
- One named file version that releases production
MorningTents states on its custom printing and production page that its team prepares 2D and 3D proofs. Confirm the proof scope and revision allowance for the quoted products.
Step 5: Add Supporting Displays by Function
Then choose secondary items only when they solve a layout or communication need.
Use custom banner flags to mark the booth from an aisle or outdoor approach. A flag should support the main message, not introduce a separate campaign.
Add branded table covers when a working table faces visitors. Check where staff, boxes, and products will sit so they do not hide the main logo.
Use a trade show backdrop for presentations, interviews, product photography, or a controlled background. Confirm the visible size, frame footprint, lighting, and camera angle.
Pop-up banners can explain services, specifications, or steps. Place them where visitors have time to read. Do not block entrances or create a narrow aisle.
Step 6: Plan Access, Power, and Venue Compliance
However, a visually consistent booth still needs to work safely for visitors and staff. Ask the organizer for the current exhibitor manual before finalizing the layout.
First, keep access routes, entrances, counters, and demo positions usable. The U.S. Access Board guide to accessible routes explains how accessible routes connect spaces and elements under U.S. ADA standards. Local laws and venue rules may set different requirements, so confirm the applicable standard for each event.
In addition, power needs a written plan. Lighting, screens, chargers, and demo equipment can add cables and connection points. The OSHA electrical safety overview identifies risks such as improper flexible cords, missing ground-fault protection, and equipment misuse.
Confirm these items with the venue or qualified contractor:
- Approved power supply and outlet location
- Cable type, routing, and protection
- Lighting load and equipment ratings
- Fire and material documentation
- Emergency access and exit restrictions
- Ballast, anchoring, and overhead-display rules
Do not treat this article as a substitute for venue approval or local safety review.
Step 7: Build a Consistent Packing System
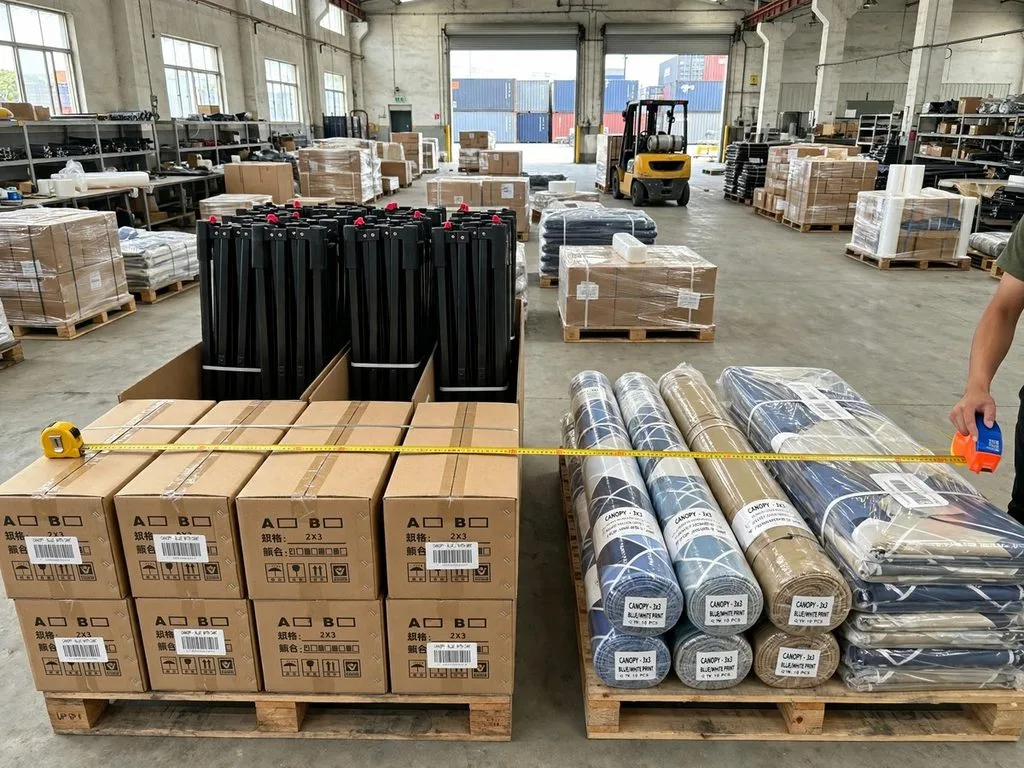
Next, make the kit consistent in storage as well as on the show floor. Give every complete kit a unique ID.
Use the same ID on:
- Carry bags and cartons
- Frame or structure label
- Printed panels
- Accessory pouch
- Spare-parts box
- Packing list
- Setup guide
Next, group parts by setup sequence. For example, place anchor hardware and tools where the crew can reach them before opening graphic panels.
For multi-city campaigns, add the destination, artwork version, and event date to the outer label. This information reduces sorting errors at a central warehouse.
Step 8: Prepare Setup Instructions and Spares
Then create a one-page setup guide for each kit. Use photos, part names, and the actual sequence. Add a QR code only as a backup because event teams may have poor network access.
The guide should cover:
- Unpacking order
- Main structure assembly
- Graphic-panel positions
- Anchoring or ballast
- Power and lighting checks
- Final brand and safety inspection
- Pack-down, cleaning, and storage
Also prepare a practical spare set. It may include fasteners, connectors, print panels, repair materials, stakes, straps, power accessories, and cleaning items. The exact list depends on the selected products.
Step 9: Approve the Kit as One System
Finally, do not approve each item in isolation. Set up the complete kit before mass production or full campaign rollout.
During the review, check:
- Logo size and direction from every visitor approach
- Color consistency across different textiles and print methods
- Message order from distance to close range
- Furniture placement and storage access
- Visitor route and staff working area
- Lighting, cables, anchors, and venue restrictions
- Packed size, labels, and missing-part risk
Record the approved layout with photos and a component list. That record becomes the reference for production inspection, warehouse packing, and future reorders.
Common Mistakes That Break Brand Consistency
Using too many messages
Give each viewing distance one message. Move detailed claims to close-range materials.
Approving colors only on screen
Use a physical swatch or print sample when color accuracy matters. Record the approved reference.
Ordering products from separate briefs
Use one master artwork sheet, one naming system, and one final proof set across all suppliers.
Ignoring the packed kit
Confirm weights, dimensions, carton counts, labels, and spare parts before shipment.
Treating safety as a final check
Review access, power, anchors, and venue rules while designing the layout. Late changes can disrupt graphics and furniture placement.
Frequently Asked Questions
Does every trade show display kit need a canopy tent?
No. Indoor booths may use a backdrop, counter, banners, and table cover. Choose the main structure according to the venue and visitor journey.
How many brand colors should the kit use?
Follow the approved brand system. Use one dominant color and a limited supporting palette when the brand guide allows it. Confirm physical print references for critical colors.
Should every component display the logo?
No. Repetition can make the booth feel crowded. Use the logo on high-value surfaces and give other panels a clear communication role.
Can buyers reorder one printed component later?
Often, but compatibility depends on the model and artwork file. Record dimensions, attachment methods, material, print process, and approved file version.
What should buyers send for a quotation?
Send the booth size, venue type, visitor journey, product list, quantities, artwork status, accessories, packing needs, destinations, and required arrival date. Ask suppliers to list all exclusions.
Turn the Display Kit into a Repeatable Brand Asset
A complete trade show display kit should guide visitors and help staff work. Start with one visual anchor, add supporting displays by function, and control every item through one artwork system.
Before ordering, approve the assembled layout, packing plan, setup guide, and spare-parts list. Then send the locked specification to each supplier for an itemized quote.
Buyers planning a custom package can submit the brief through the MorningTents custom event display contact page.